Showing posts with label home projects. Show all posts

Monday, September 3, 2012

Dining Table refinish with Annie Sloan

Have you ever seen that commercial for Staples that ran in August and September a couple years ago,
"It's the most wonderful time of the year..."
with the kids going back to school and mom suddenly left with all this free time on her hands?  Well, it's a bitter-sweet time for me with my babies off to kindergarten and my big guy in 3rd already.  I won't ask where the time has gone, because I know you don't know either.
At any rate, I actually really miss my kiddos while they are in school, but it does give me {a little} time to catch up on some projects I've been wanting to do.

First up is this dining room table that needed a little refresher course for our new lighter, brighter color pallet. 


You see, what I'd really love is a *new* dining table...say maybe like this one
from Restoration Hardware.  Can you hear my heart pitter-patter through the computer?
I've only been eyeing this table since I built my kitchen island. It would compliment the island so well, fit more than one additional dining guest like our table now, is made from this beautiful reclaimed wood; sorry, I need to wipe the drool off the keyboard.  Alas, this table as I'd like it, after delivery/tax/blah blah is upwards of $3,500. Ouch! So I just dream...and beg my uncle to help me build one just like it!

However, in the meantime, I decided to give our dining table a little face lift and it didn't cost more than $100. 
Enter: Annie Sloan Chalk Paint. This paint is AMAZING.  Granted it is a little pricey compared to other paints out there, but it is well worth it for so many reasons. First, and one of my favorite reasons, you don't need to sand or prime. Yes, you read that correctly: NO sanding OR priming. AT ALL.  Uh huh, even on finished wood.  Ok, as if that's not enough right there to make it worth it's price in gold...it also covers in one coat most of the time, otherwise two. And, {do we even need more reasons} it has this wonderful finish that distresses beautifully and make your pieces look old and rustic. Well, ok that one sounds a little weird, "makes your pieces look old" but in a good way! Oh oh and no brush strokes! That's a huge bonus for me. I'm not a big fan of that brush stroke look on painted furniture. But this paint doesn't leave any brush marks! It's actually pretty incredible. 

Alright, let's get on with it already! So first thing I did was take my table outside and sand.

 I know, I know, I just got finished raving about how you don't have to sand and the first thing I did was sand. Let me explain.  I was trying to decide if I wanted to leave it the original color of the wood and just put a clear finish over it, if I wanted to stain it, or if I wanted to paint it.  So I need to strip it down to the wood in order to decide.


In the end, I wasted 4 hours didn't end up needing to sand at all, but I had to see all my options first.

So here we have it completely stripped down on top {with the pedestal base still stained ebony}
I himmed and hawed for a few days trying to decide if I was going to stain it gray {trying to achieve that rustic, reclaimed finish of the Resto table} or paint it white. I went to Home Depot three times and each time walked to the check-out with a can of gray stain in my hand and each time brought it back to the shelf before buying it. Finally I decided I'd paint it. There's so much I love about that Resto table, but trying to copy it with this table isn't going to happen.
 
I put my helpers right to work.
 
Notice they are painting directly over the ebony stain? See I didn't lie! You really can use this paint without sanding or priming!! That's Annie Sloan "Old White" they are using. Just two coats is all it took to completely cover that super dark stain.
Next step is to paint the top. I flipped over the leaf to paint a bunch of samples on the underside.

I tried many combinations...including, {but not limited to}: Annie Sloan Paris Gray full strength, half strength mixed with water {Oh YEAH! That's another huge bonus of these paints, you can thin with water or mix with other shades of paint and make a plethora of new colors and washes}, half Paris Gray/half Old White, a mix of Paris Gray, Old White and water, etc. etc.
I started to get overwhelmed with the options so I just kinda went with something. I think I ended up using about a quarter part water, a quarter part Paris Gray and half Old White. {But I could never match it again if I tried!} After just one coat of the paint, I waxed it to get a good seal from all the sticky, gooey, drippy stuff that's gonna spill on it, and viola!
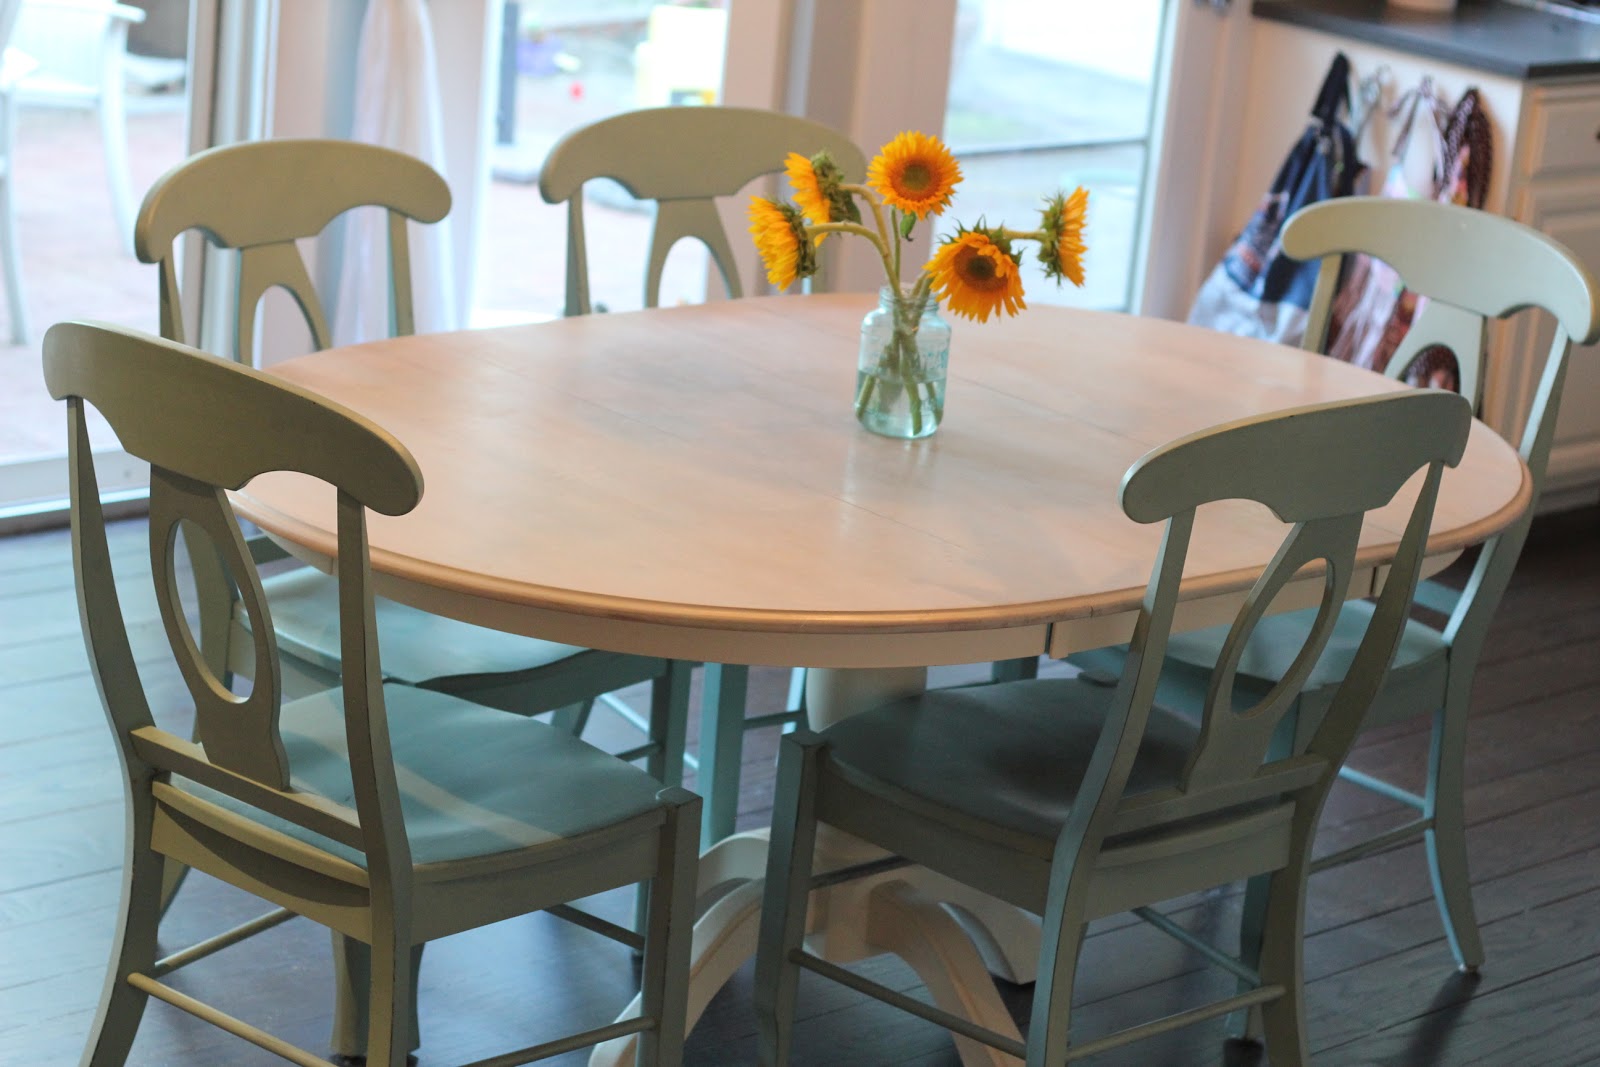

 
Do you like it? I love it! It's so fresh and bright. Oh, and did you notice the chairs? I didn't mention those yet! I painted them as well.  I used a mixture of 3 parts Annie Sloan Duck Egg and 1 part Old White. I didn't sand or prime! I'll give you a little more detail on those soon. 
 
Do you have anything that needs a little updating and dream of painting it but are too scared? You gotta give this Annie Sloan paint a try!  The best part is, if you don't like it, you can just paint right over it, no sanding or priming required!  Smile!

Saturday, January 28, 2012

So, how did I score?

Hi there Friends!  Gung Hay Fat Choy!

With it being the Chinese New Year and all, I figured it would be a good time to revisit my House Goals from 2011 and see how I scored. And then, of course, set some new house goals for 2012!  Ok, ok, give me a break…I guess I’m a month late on this whole goal setting thing, but it’s really never too late, is it?  Ok, good.

So last year for the first time I set some house goals for the year. Here’s a quick summary of what they were:

1. Fix the large hole/ install lights in my kitchen ceiling

2. Build a kitchen island

3. Paint the fireplace

4. Finish the master bath remodel

5. Paint my son’s room

6. Install board and batten in the family room

7. Paint the main living space

8. Paint the interior doors

9. Paint the exterior of the house

10. Paint the mailbox

11. Do something with the broken shutters in the master bedroom

So….how did I do? 

Score: 8/11= 73%…hummm, C-. Well, ok, could have been a little better, but I had a few ambitious goals!

Let’s review, shall we?

1. Fix the hole in the kitchen ceiling/ install a light so I don’t have to cook in the dark: Big fat FAIL!

Here’s how my kitchen ceiling looked one year two-and-a-half years ago and here’s how it still looks today:

kitceiling

But that’s not to say we haven’t thought about it! We’ve actually had a few contractors out to bid a huge skylight that will cover approximately a 4ft by 6ft space on the ceiling! And then we’ll hang a chandelier down and add a few can lights on the right. So we’re getting there!

2. Build a kitchen island: COMPLETED!

I fell in love with the Restoration Hardware reclaimed wood kitchen island and just had to have it. Since it was too large for my space, the only thing that made sense was to build one myself! So that’s just what I did. I found some reclaimed barn wood, purchased a slab of Carrera marble and started sanding. See all the details here and here.

island

3. Paint the fireplace: COMPLETED!

My husband was away on business for a couple of days, so I took that opportunity to surprise him with a newly painted fireplace AND I built a mantel to go with it

(I think I deserve extra credit for that one!)

See the painting here and mantel building here.

fireplace_mantel

4. Finish the master bathroom remodel: COMPLETED!

The whole reason I started this blog: to chronicle the remodel of our master bathroom for my family to see. You see, as a child, my parents built the two houses I grew up in. See, this isn’t my fault, it’s in my genes! I wanted an easy way for them to follow our first remodeling project in our “new” house. And so the blog was born. See the  progress here and here.

bathsinksbathwainscoting shower

5. Paint my son’s bedroom: COMPLETED!

After 250 paint chips on his walls, I finally narrowed it down to a small handful of colors and let my son chose the final color.  His choice: Benjamin Moore Quiet Moments…and a great choice that was. My little prodigy. So proud.

quiet moments

IMG_2786

6. Install Board and Batten in the family room: COMPLETED!

We were so thrilled with how the board and batten looked in the family room, that we decided to install it in our master bedroom, too! 

I think that deserves some extra credit as well!

See the progress here and the finished product here. And then the follow up to my finished product (the insanity post) here. And the she-is-seriously-crazy post here.

board batten

boart batten 2

7. Pick a paint color for the family room: COMPLETED!

Actually, that should read: completed TWICE!!!  Again, some extra credit please? 

I painted the family room once in Benjamin Moore Nimbus Gray, and then again in a 50% formula of Nimbus Gray (after trying a 25% formula). See the contemplation here and here.

Now, I shouldn’t even mention the next part of this story, but we’re friends, so I’m gonna anyways…I’m in the process right NOW of painting it AGAIN. But you know what I say to my husband, I’m not really crazy, I just love this stuff!  Changing the paint color in your home is one of the biggest bangs for the buck you can get. I remind him to be happy that I’m just buying a $50 can of paint and not a $3000 sofa every time I want to change up the look. See, it could be a lot worse!

paint boart batten

8. Paint the interior doors: FAIL!

I really really want new interior doors, actually. So I probably won’t waste the time painting our current doors. Here’s what I am drooling over:

5 panel door

Source: The Pleated Poppy

9. Paint the exterior of the house: FAIL!

Ok, I got a few bids for this (I think it may be too big of a project for me to tackle by myself: paint chipping, dry rot, lead paint…um, yeah) but I had no idea painting the exterior would be so expensive.  Here in N. California, my bids are around $7000.  Ouch!

10. Paint the mailbox: COMPLETED!

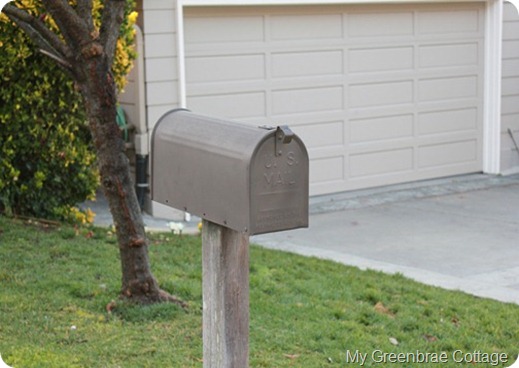
I spray painted my ugly gold mail box almost a year ago and I’m very happy to report, it’s holding up beautifully! No need to repaint any time soon.  See how I did it here.

mailbox

11. Fix the shutters in the master bedroom: COMPLETED!

A while back my sweet doggie panicked and torn apart the shutters in our master bedroom. You can read about it here. So finally a year later I took them down and replaced them with my new favorite drapes from World Market. See the details here.

drapes in master

Let’s rescore this now…I completed 8 of 11 projects, but earned extra credit on 3 of them…so that brings my score to, well what do you know: 11/11= 100% Yay me! Smile!

Stay tuned for my House Goals of 2012 coming up shortly. I bet you can make some strong predictions!

Hugs, Celeste


Tuesday, November 1, 2011

What to do with a narrow window

Hi Friends! Happy November!

With only 2 months left of 2011, I figured I’d better see how I’m doing on my House Goals for 2011! 

I’m proud to share: I checked one off today!!

Goal #11: Do something about those shutters in the master bedroom that got torn to pieces by the wild animal we live with.

For a year these dingy, used-to-be-beige, half eaten shutters have been hanging in our bedroom. Since we hope to replace these windows one day in the near future, we didn’t want to spend and arm and leg on window coverings. But the windows are so narrow, we didn’t know what to do with them.  And like most things, when we don’t have an answer, we just let them sit…and sit and sit. Eventually we get so used to looking at it, it no longer bothers us {does that ever happen to you?}

Well, last week I found the perfect solution. Restoration Hardware carries a swing arm drapery rod that extends from 11 inches- 20 inches…perfectly narrow for these narrow windows. And the best part, it matches the other drapery rods in our house.

Here’s the before.

IMG_1695

Please excuse the less-than-inspiring master bedroom. We haven’t worked on it since finishing the board and batten {hence the reason I’ve never shown you the finished board and batten}

First, I removed the shutters.

IMG_1706

In case you haven’t read the story yet, here’s why I had to remove them:

IMG_0810

IMG_1714


Drilled a couple of holes {and was super thrilled to hit a stud every time!!}


IMG_1721

And tied on my favorite drapes, Cost Plus World Market’s Crinkle Voile drapes…LOVE THEM! I have them in my dining room too.

IMG_1725


And here you go!

IMG_1726

Before:                                After:

IMG_1700 IMG_1728

I admit, I do LOVE the shutter look.  I miss the shutters actually, and one day I’d like to have shutters again. But for now, this was an easy solution for a narrow window. {You just might see those exact shutters reappear as artwork over my bed one day…I’ve got some ideas bouncing around…}

Now, what else is just sitting around getting no attention ‘cause we got so used to looking at it?  Hum…..

January_2011_079_thumb[2]

Guess I haven’t completely finished this year’s house goals.

Smile!!

Hugs,

Celeste

Monday, September 19, 2011

Word Art

Hi Friends!

I am increasing intrigued & inspired by some of the wonderful word art I have been seeing around.  There are so many many wonderful ideas all over the internet, but I  came across this one locally last week.  I love it as a whole and also love each of the little sayings on their own.  Oh the possibilities!  I have my eyes open for just the right medium on which to create my own!

This one is stenciled on two separate pieces of black painted wood.  I love how all the sayings run into each other.  And I love the simplicity of the artwork itself. So simple yet so powerful.

{Sorry about the picture quality, I had to take this one with my phone}

IMG_0494

I suppose you can read it right off the picture, but here are all the sayings if you’d like to cut and paste any!

He used to say things like

all that glitters is gold

and you catch more flies with honey than vinegar

money doesn’t grow on trees

never trust a man a dog doesn’t like

early to bed and early to rise makes a man healthy, wealthy and wise

beggars can’t be choosers

where there’s a will there’s a way

a closed mouth catches no flies

a bird in the hand is worth two in the bush

the squeaky wheel gets the oil

an apple a day keeps the doctor away

don’t count your chickens before they hatch

a leopard cannot change its spots

the early bird gets the worm

don’t throw the baby out with the bathwater

a watched pot never boils

good things come to those who wait

never trust a skinny cook

a rolling stone gathers no moss

waste not want not

cloudy mornings give way to clear evenings

two heads are better than one

makes hay while the sun shines

into every life a little rain must fall

finders keepers losers weepers

it goes without saying he was a good man.

------------------------------------------------

So there ya go, permission to use clichés!

Hummm, I’m thinking on a large pallet perhaps? 

Smile!

hugs, Celeste

Thursday, June 23, 2011

Fourth of July Rag Wreath

Hi and Happy Summer! 

It’s officially summer and has finally stopped raining in N. Cal, Yay!!

I have been sooo wrapped up in my master bedroom remodel, I have been neglecting the {kids, cooking, laundry, bathrooms} rest of the house/decorating for summer.  Then I saw this rag wreath the other day on Twin Dragonfly Designs and haven’t stopped thinking about it since.

dragonflyragwreath

I loved coming home every day to my Valentine’s Day Wreath; it made the front door so welcoming.  I figured I could adapt the rag wreath to make one for the 4th of July! 

IMG_6844

I felt guilty about starting {yet} another project before finishing all of the other ones I have begun…so before I made this wreath today, I did a primer coat on all my picture frames and mirror. I am trying to finish my photo gallery wall which will sit on the picture ledge atop the board and batten in our family room.

IMG_6832 IMG_6833

And then I allowed myself to take a detour to the fabric store for my 4th of July Wreath!

IMG_6834

Materials Needed:

~1 yard of red fabric

~1 yard of white fabric

~3/4 yard of blue fabric

~a foam (or any kind would work) wreath

Easy Peasy Directions:

I ripped the fabric into strips that were 2” wide by 14” long (I could get 3 strips per length of fabric…42” wide fabric)  I ended up using 50 strips of red, 50 strips of white and 39 strips of blue. 

Next I tied the strips onto the wreath in a simple knot.

IMG_6839

I did 5 strips of red, then 5 white, then 5 red and so on. 

IMG_6840

I alternated the knot placement to make it as full as I could.

IMG_6842

And then I scrunched them all together.  And in just an hour I had a festive wreath to welcome guests {and myself}!

IMG_6847


IMG_6844

It makes me smile every time I come home!

Now I’m off to do a 2nd coat of spray paint on those frames.  Smile!

Sunday, June 12, 2011

If You Give a Room New Floors…

Ok, those of you with kids…have you heard of the series of books by Laura Numeroff: If You Give a Pig a Pancake or If You Give a Mouse a Cookie?  Well, that’s what happened around here this weekend!  {If you haven’t heard of the books, basically it’s a comical sequence of events that follow “naturally” from one simple action.} 

So do you remember how we started refinishing the hardwood floors in our master bedroom last week?  The hardwood floors were finished in a matter of 2 days and technically we could have moved our bed and clothes back in last Friday.  However…you might recall, with all the furniture out of the room, I realized it was the perfect time to paint the ceiling if we were ever going to. 

IMG_6517

Once I had the paint out, and the closet doors were down for the floor refinishing, it seemed only natural to paint the closet doors.  They were a dingy shade of off-white like everything else in that room and would look so much fresher with a coat of super white paint {Benjamin Moore Chantilly Lace, to match the rest of the trim work in the room/house} 

IMG_6545

This project turned into kind of a nightmare and had me wishing I’d never started.  {I knew this about 5 minutes in to this 5+ hour project} Turns out they were originally sprayed with oil based paint and the light sanding I gave them didn’t come close to prepping them for a fresh coat of latex semi-gloss.  Three coats and three hundred cuss words sighs of frustration later, they were “finished”.  Not my best work.

IMG_6543

I would describe them as looking like 100+ year old doors from a beach house, that have been repainted about 10 times.  Well, at least that’s not the worst look I could have achieved!

Moving right along.  So naturally when you refinish any floor, you must first remove baseboards.  Which of course means you need to put them back…OR replace them if you are ready for a new look…which of course we are! 

IMG_6608

My husband installed the same super tall {7 1/2 inch} baseboards that we put in around the rest of the house.  But why stop there?  If you are replacing baseboards, you might as well add some board and batten while you’re at it…easier to do it with the furniture out of the room, you know.

The first time we did board and batten was earlier this year in the family room.  We did traditional board and batten and actually installed the BOARDS behind the battens. {see it here}  However, for the bedroom, we decided to do the faux board and batten we’ve seen all over blog land. To do the faux board and batten, one must first paint the wall white to imitate the white wood panels. {I had to leave the places bare where DH marked off for the strips of wood to go.}

 IMG_6616

Now when you have a wet white roller, you naturally look around for other things that need to be rolled white…just so you don’t waste a perfectly good new roller.  Of course, that was easy….the insides of both of our closets were overdue for a fresh coat of paint:

IMG_6602

So I finally got the white paint put away {after priming a few more boards outside} and started in with the caulk and wood putty.  DH had to snap a pic: {just ignore those shutters in the background…I have no idea what to do with them…see how they were ruined here}

IMG_6661

Oh oh OH, I almost forgot to mention….because all of the wood needed to acclimate for 72 hours in the master bedroom, we were in *need* of something to do for a day…so we came out into the family room and finished the picture ledge on the board and batten!

IMG_6599

IMG_6597

I’ll show you more after pictures of it when I come up to breathe.

After that slight detour, we were back in the master bedroom. 

IMG_6666

And here’s what it looks like when we decided to call it a night:

IMG_6669

I’m realizing I haven’t even given you an after shot of the new floor, but you get a glimpse from this pic above.  We love it! 

So let me just summarize for those of you following my book analogy:

If you refinish the hardwood floors, you might as well paint the ceiling while the furniture is out of the way.  And speaking of painting, you should also paint the closet doors before putting them back up.  If you paint the closet doors, it’s only natural to paint the inside of the closet too.  With the wet roller from the closet, you can do your primer coat of paint for the faux board and batten.  Since you had to remove all of the baseboards to do the hardwood floor, makes sense to replace them with new ones to bring the house into the 21st century.  When you install new TALL baseboards, they are just shouting out for board and batten to go on top.  And of course, board and batten feels a little lonely without some crown to finish it off {Oh, I haven’t told you about that yet!}

Well, folks, that’s all for today. We’re BEAT! I’d say this hardwood floor project has accidentally officially turned into a

full-blown master bedroom remodel. 

On tap tomorrow: oh just a little a butt-load of painting! 

Smile!