
This year I decided to be crafty and make most of my Christmas gifts. For the most part I'd say it was a good idea...though as most of my projects seem to go, it took much longer a bit longer than I anticipated. However, I am so thrilled with the finished product that it made it all worth it.

Fancied-up towels for kitchen or bath.
Here's how I made them:
I picked up some white hand towels from Costco...they are super thick and absorbent and go with any decor.
Then I browsed around for quite some time looking for just the right fabrics. I am starting to get addicted to fabrics with how many super cute designs I've been seeing lately. I love fabric.com for their huge selection and great prices. Usually they are my go to place for fabric. But this time I stumbled upon a wonderful Etsy store Poppy Seed Fabrics. Kim sells the most adorable fabrics. She seriously finds everything that is cute from fabric.com and who knows where else and puts them all in one place for you to drool over. What sold me on buying from her this time was the bundles she creates. She puts together 3-6 different fabrics that all coordinate and sells them in bundles of 1/2 yd. or full yds. each. (She's also willing to create your own bundle and cut to any size you like...but I LOVE that she's already done the work for you of finding coordinating fabrics, so I stuck with her bundles, well for the most part!)
Since I am making these for a number of women, I needed to come up with color schemes that would work for many different tastes. I finally decided on these two bundles (with a few minor changes)

Paula Prass Woodland Delight & coordinates

Black and White...Oh Goody!
I pre-washed the fabrics so nothing funky would happen when washing after assembled.
I ripped strips of fabric 1 1/2 inches wide by about twice as long as the width of the towels. I wanted that "torn" look as I didn't plan to hem the edges, so ripping worked well. If you have a rotary cutter, that would work well, too. But cutting by hand with scissors would take you for-ev-ah!

Once I had all my pieces ripped out, I did a long basting stitch down the middle of each strip.

To make the ruffle you gently pull on the bobbin thread (the underside) of the fabric and scrunch the fabric up as you go down the strip. Careful not to pull too hard or you'll break your thread and need to re-stitch the baste again.
I planned a dozen towels at a time so that I wouldn't end up with too many of one print at the end. I tried sewing the first few strips without pinning them down to the towels but ended up with crooked ruffles! So I pinned all of the ruffled strips to the fabric. I pinned them all before starting to sew any of them.
And now, time to sew....and sew.....AND SEW!

I stitched 3 strips onto each towel.

Here's my first two:

I liked them the way they are, but I thought they could use a little more somethin' somethin' at the bottom. I was thinking pom poms or ribbon and finally decided on ric rac.


I think I'm violating my sewing machine's union hours and it might go on strike soon. But I have a few more Christmas projects to finish.....
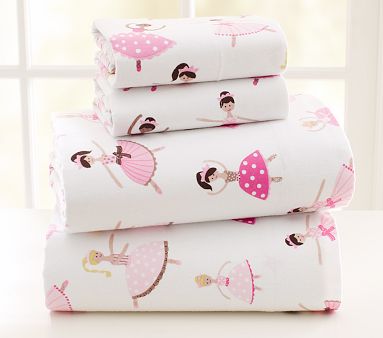 -Sheets/pillows/duvets for my twin girls' beds (
-hair accessories for my girls (headbands, flowers)
-a Yoda robe for my son
Did I tell you, I get to pick up my wood today for my island! I found 100+ year old reclaimed oak at local shop. I'll post some pics as soon as I get it!
OK, my sewing machine is calling.
So are the kids!
The countdown is on:
12 Days until Christmas!
I am so excited to be linking up to a couple few linky parties!
The Homemade Christmas Gifts Party at Tater Tots and Jello!
It's a Holly Bloggy Party, be sure to visit!

And the Handmade Tuesdays Party at Ladybug Blessings!

And the Sew Cute Tuesdays at Creative Itch!

And Teach Me Stuff at Hope Studios!

And Letting the Creative Juices Flow party at These Creative Juices!


oh so adorable!! Please come link up tomorrow at ladybug blessings handmade tuesdays! www.ladybug-blessings.com
ReplyDeleteWhat a great idea! And they turned out so cute!
ReplyDeleteHope you can come by for my Holly Bloggy Recipe Party on Thursday!
Nice photography. DO you do it yourself?
ReplyDeleteI like these!! Do they wash up well, (I'm worried about the fabric unraveling a lot)?
ReplyDeleteThanks everyone!
ReplyDeleteI do my own photography, yes! I asked Santa for a new camera, in fact.
@ CountryBelle: I pre-washed them once before gifting. I hope that most of the unraveling happens the first time. It's unraveled about 4 or 5 rows of weaving in, so hopefully it's done. I'll let you know after a couple more washes. You could always hem them....even just a zigzag stitch at the end without turning the end under so it goes faster.
I think you have just given me an idea to give my old aloha shirts with great patterns and designs a second life.
ReplyDeleteOH, yes, great idea with the Hawaiian shirts! You can use any old fabric you have. Great for re-using fabric that is sentimental but doesn't fit or is out of style.
ReplyDeleteHow about a "Bay to Breakers" T-shirt from 1983?
ReplyDeleteso glad you came to link up! I am featuring this in my handmade features post so feel free to come grab a button!
ReplyDeleteLove these! What did you do to the sides? Did you turn them in or leave them frayed??
ReplyDeleteHI Pamela! Thanks for stopping by. :-) I left them frayed...kinda wish I had hemmed them now, or at leeast done a zig zag stitch on the frayed end to keep it from fraying more. I think after a few washings they should stop fraying more. But they are cute all frayed!
ReplyDeleteThose are super adorable! Great tutorial! =)
ReplyDeleteSend gifts to pakistan from usa