Showing posts with label kitchen. Show all posts

Monday, September 3, 2012

Dining Table refinish with Annie Sloan

Have you ever seen that commercial for Staples that ran in August and September a couple years ago,
"It's the most wonderful time of the year..."
with the kids going back to school and mom suddenly left with all this free time on her hands?  Well, it's a bitter-sweet time for me with my babies off to kindergarten and my big guy in 3rd already.  I won't ask where the time has gone, because I know you don't know either.
At any rate, I actually really miss my kiddos while they are in school, but it does give me {a little} time to catch up on some projects I've been wanting to do.

First up is this dining room table that needed a little refresher course for our new lighter, brighter color pallet. 


You see, what I'd really love is a *new* dining table...say maybe like this one
from Restoration Hardware.  Can you hear my heart pitter-patter through the computer?
I've only been eyeing this table since I built my kitchen island. It would compliment the island so well, fit more than one additional dining guest like our table now, is made from this beautiful reclaimed wood; sorry, I need to wipe the drool off the keyboard.  Alas, this table as I'd like it, after delivery/tax/blah blah is upwards of $3,500. Ouch! So I just dream...and beg my uncle to help me build one just like it!

However, in the meantime, I decided to give our dining table a little face lift and it didn't cost more than $100. 
Enter: Annie Sloan Chalk Paint. This paint is AMAZING.  Granted it is a little pricey compared to other paints out there, but it is well worth it for so many reasons. First, and one of my favorite reasons, you don't need to sand or prime. Yes, you read that correctly: NO sanding OR priming. AT ALL.  Uh huh, even on finished wood.  Ok, as if that's not enough right there to make it worth it's price in gold...it also covers in one coat most of the time, otherwise two. And, {do we even need more reasons} it has this wonderful finish that distresses beautifully and make your pieces look old and rustic. Well, ok that one sounds a little weird, "makes your pieces look old" but in a good way! Oh oh and no brush strokes! That's a huge bonus for me. I'm not a big fan of that brush stroke look on painted furniture. But this paint doesn't leave any brush marks! It's actually pretty incredible. 

Alright, let's get on with it already! So first thing I did was take my table outside and sand.

 I know, I know, I just got finished raving about how you don't have to sand and the first thing I did was sand. Let me explain.  I was trying to decide if I wanted to leave it the original color of the wood and just put a clear finish over it, if I wanted to stain it, or if I wanted to paint it.  So I need to strip it down to the wood in order to decide.


In the end, I wasted 4 hours didn't end up needing to sand at all, but I had to see all my options first.

So here we have it completely stripped down on top {with the pedestal base still stained ebony}
I himmed and hawed for a few days trying to decide if I was going to stain it gray {trying to achieve that rustic, reclaimed finish of the Resto table} or paint it white. I went to Home Depot three times and each time walked to the check-out with a can of gray stain in my hand and each time brought it back to the shelf before buying it. Finally I decided I'd paint it. There's so much I love about that Resto table, but trying to copy it with this table isn't going to happen.
 
I put my helpers right to work.
 
Notice they are painting directly over the ebony stain? See I didn't lie! You really can use this paint without sanding or priming!! That's Annie Sloan "Old White" they are using. Just two coats is all it took to completely cover that super dark stain.
Next step is to paint the top. I flipped over the leaf to paint a bunch of samples on the underside.

I tried many combinations...including, {but not limited to}: Annie Sloan Paris Gray full strength, half strength mixed with water {Oh YEAH! That's another huge bonus of these paints, you can thin with water or mix with other shades of paint and make a plethora of new colors and washes}, half Paris Gray/half Old White, a mix of Paris Gray, Old White and water, etc. etc.
I started to get overwhelmed with the options so I just kinda went with something. I think I ended up using about a quarter part water, a quarter part Paris Gray and half Old White. {But I could never match it again if I tried!} After just one coat of the paint, I waxed it to get a good seal from all the sticky, gooey, drippy stuff that's gonna spill on it, and viola!
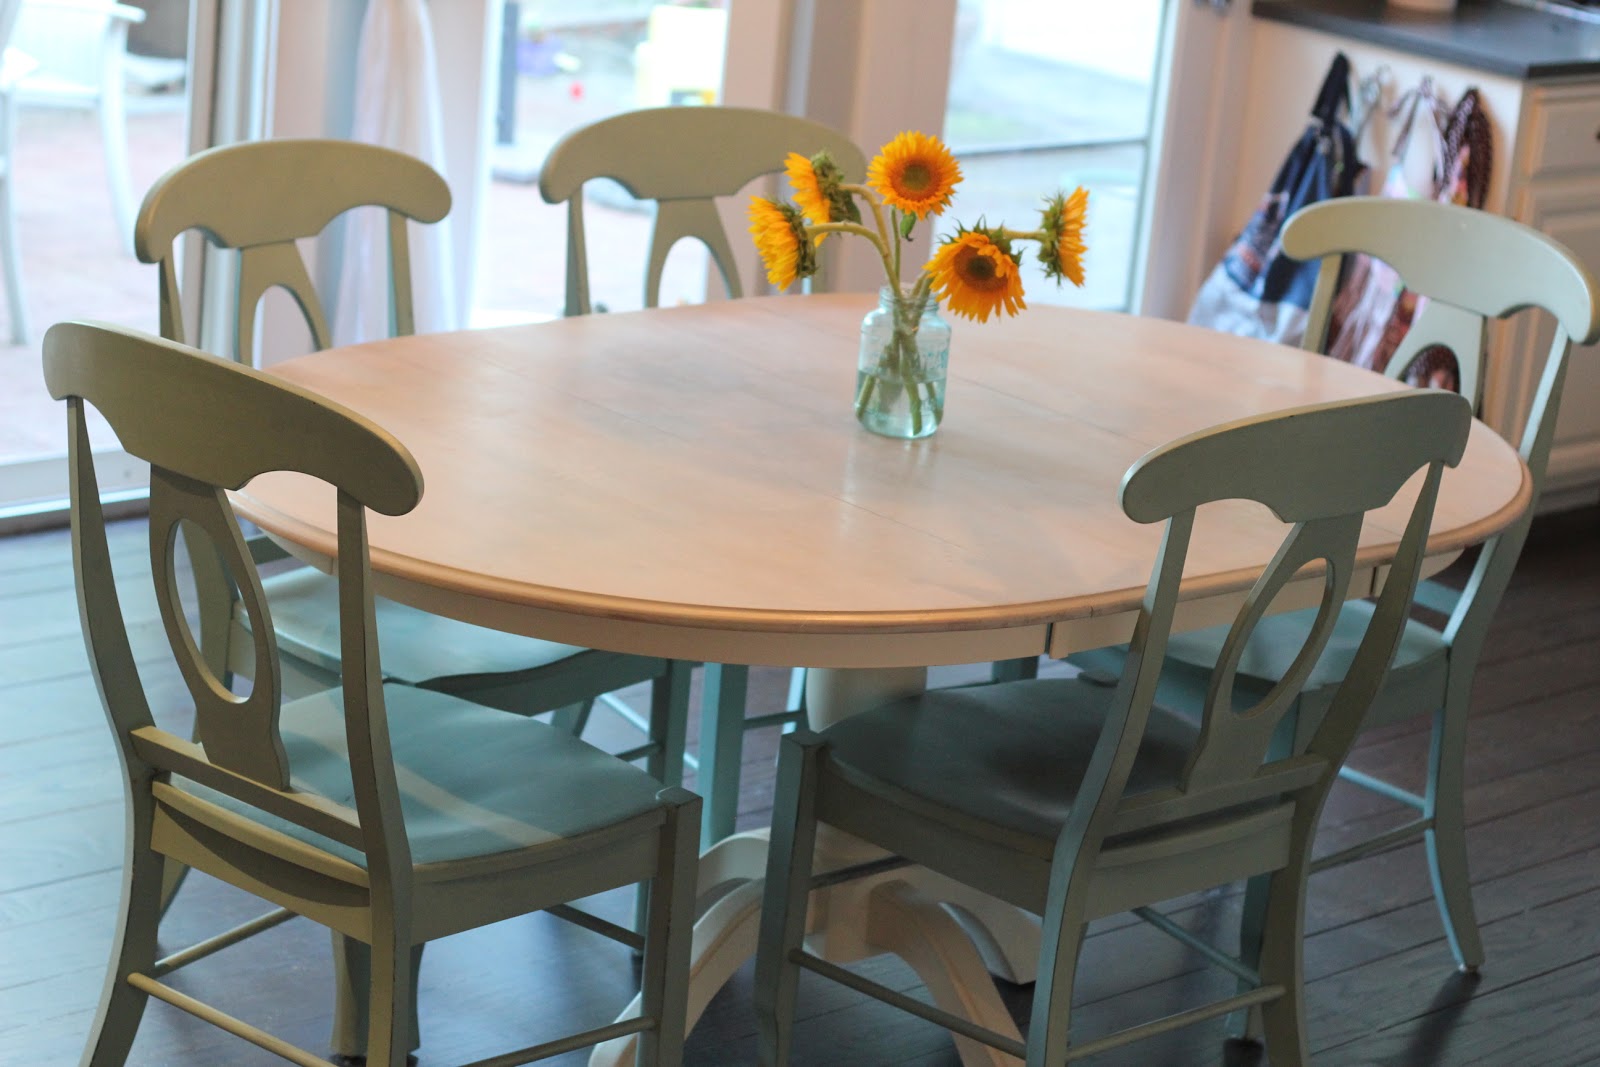

 
Do you like it? I love it! It's so fresh and bright. Oh, and did you notice the chairs? I didn't mention those yet! I painted them as well.  I used a mixture of 3 parts Annie Sloan Duck Egg and 1 part Old White. I didn't sand or prime! I'll give you a little more detail on those soon. 
 
Do you have anything that needs a little updating and dream of painting it but are too scared? You gotta give this Annie Sloan paint a try!  The best part is, if you don't like it, you can just paint right over it, no sanding or priming required!  Smile!

Saturday, January 28, 2012

So, how did I score?

Hi there Friends!  Gung Hay Fat Choy!

With it being the Chinese New Year and all, I figured it would be a good time to revisit my House Goals from 2011 and see how I scored. And then, of course, set some new house goals for 2012!  Ok, ok, give me a break…I guess I’m a month late on this whole goal setting thing, but it’s really never too late, is it?  Ok, good.

So last year for the first time I set some house goals for the year. Here’s a quick summary of what they were:

1. Fix the large hole/ install lights in my kitchen ceiling

2. Build a kitchen island

3. Paint the fireplace

4. Finish the master bath remodel

5. Paint my son’s room

6. Install board and batten in the family room

7. Paint the main living space

8. Paint the interior doors

9. Paint the exterior of the house

10. Paint the mailbox

11. Do something with the broken shutters in the master bedroom

So….how did I do? 

Score: 8/11= 73%…hummm, C-. Well, ok, could have been a little better, but I had a few ambitious goals!

Let’s review, shall we?

1. Fix the hole in the kitchen ceiling/ install a light so I don’t have to cook in the dark: Big fat FAIL!

Here’s how my kitchen ceiling looked one year two-and-a-half years ago and here’s how it still looks today:

kitceiling

But that’s not to say we haven’t thought about it! We’ve actually had a few contractors out to bid a huge skylight that will cover approximately a 4ft by 6ft space on the ceiling! And then we’ll hang a chandelier down and add a few can lights on the right. So we’re getting there!

2. Build a kitchen island: COMPLETED!

I fell in love with the Restoration Hardware reclaimed wood kitchen island and just had to have it. Since it was too large for my space, the only thing that made sense was to build one myself! So that’s just what I did. I found some reclaimed barn wood, purchased a slab of Carrera marble and started sanding. See all the details here and here.

island

3. Paint the fireplace: COMPLETED!

My husband was away on business for a couple of days, so I took that opportunity to surprise him with a newly painted fireplace AND I built a mantel to go with it

(I think I deserve extra credit for that one!)

See the painting here and mantel building here.

fireplace_mantel

4. Finish the master bathroom remodel: COMPLETED!

The whole reason I started this blog: to chronicle the remodel of our master bathroom for my family to see. You see, as a child, my parents built the two houses I grew up in. See, this isn’t my fault, it’s in my genes! I wanted an easy way for them to follow our first remodeling project in our “new” house. And so the blog was born. See the  progress here and here.

bathsinksbathwainscoting shower

5. Paint my son’s bedroom: COMPLETED!

After 250 paint chips on his walls, I finally narrowed it down to a small handful of colors and let my son chose the final color.  His choice: Benjamin Moore Quiet Moments…and a great choice that was. My little prodigy. So proud.

quiet moments

IMG_2786

6. Install Board and Batten in the family room: COMPLETED!

We were so thrilled with how the board and batten looked in the family room, that we decided to install it in our master bedroom, too! 

I think that deserves some extra credit as well!

See the progress here and the finished product here. And then the follow up to my finished product (the insanity post) here. And the she-is-seriously-crazy post here.

board batten

boart batten 2

7. Pick a paint color for the family room: COMPLETED!

Actually, that should read: completed TWICE!!!  Again, some extra credit please? 

I painted the family room once in Benjamin Moore Nimbus Gray, and then again in a 50% formula of Nimbus Gray (after trying a 25% formula). See the contemplation here and here.

Now, I shouldn’t even mention the next part of this story, but we’re friends, so I’m gonna anyways…I’m in the process right NOW of painting it AGAIN. But you know what I say to my husband, I’m not really crazy, I just love this stuff!  Changing the paint color in your home is one of the biggest bangs for the buck you can get. I remind him to be happy that I’m just buying a $50 can of paint and not a $3000 sofa every time I want to change up the look. See, it could be a lot worse!

paint boart batten

8. Paint the interior doors: FAIL!

I really really want new interior doors, actually. So I probably won’t waste the time painting our current doors. Here’s what I am drooling over:

5 panel door

Source: The Pleated Poppy

9. Paint the exterior of the house: FAIL!

Ok, I got a few bids for this (I think it may be too big of a project for me to tackle by myself: paint chipping, dry rot, lead paint…um, yeah) but I had no idea painting the exterior would be so expensive.  Here in N. California, my bids are around $7000.  Ouch!

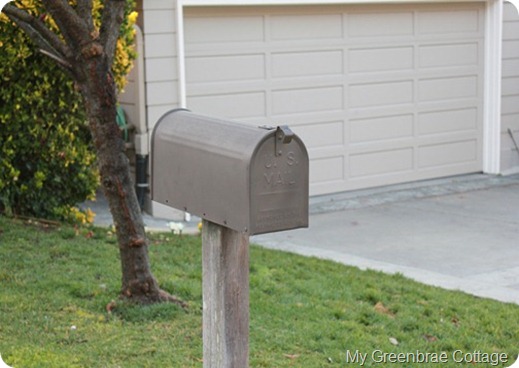
10. Paint the mailbox: COMPLETED!

I spray painted my ugly gold mail box almost a year ago and I’m very happy to report, it’s holding up beautifully! No need to repaint any time soon.  See how I did it here.

mailbox

11. Fix the shutters in the master bedroom: COMPLETED!

A while back my sweet doggie panicked and torn apart the shutters in our master bedroom. You can read about it here. So finally a year later I took them down and replaced them with my new favorite drapes from World Market. See the details here.

drapes in master

Let’s rescore this now…I completed 8 of 11 projects, but earned extra credit on 3 of them…so that brings my score to, well what do you know: 11/11= 100% Yay me! Smile!

Stay tuned for my House Goals of 2012 coming up shortly. I bet you can make some strong predictions!

Hugs, Celeste


Sunday, March 13, 2011

Restoration Hardware Inspired Island: The Details

Hi All!
As promised, I am here to give you a few a LOT more details on my Restoration Hardware inspired island that I first posted here.
IMG_3734
Click here to see more tons of pictures of the island… and read on to learn all about how I built the island!


{Update since building island...with the extra wood from this project, I built a fireplace mantel after painting my brick white {all while my husband was out of town!!}

Tuesday, March 1, 2011

Restoration Hardware {Inspired} Island

Hi Friends!
I am so super excited to share the finished pictures of my new kitchen island with you! 
It turned out just like even better than I envisioned it, I couldn’t be happier! I’m going to do this in two posts. This first post will simply be a show and tell…and then I’ll do another post with all the steps we took to build it.
Ok, so we’ll start with a finished picture and then I’ll tell you a little about it and give you lots more views!
IMG_3737
Here is my kitchen before the island:

Wednesday, January 12, 2011

Boy, am I gonna be sore tomorrow!

My uncle showed up today with this for me:January 2011 010
Yesireeee, a Craftsman Belt Sander.Geeez, I had no idea the strength it takes to operate this thing!  I felt my arms, shoulders, back and abs {my poor bum was feeling left out} working hard as I ran this puppy up and down the boards all afternoon. I’m sure gonna need a massage tonight.

My Restoration Hardware inspired island is officially underway!
In case you’ve missed the last few posts I’ve mentioned the island, here is the picture of the one I’m in love with:
resto island
Theirs one is made from 100 year old reclaimed pine and mine will be made from 100 year old reclaimed oak, with a carerra marble slab top. {Project #2 from my “House Goals for 2011” in case you are keeping track- I can’t do #1 by myself.}

As soon as I got my hands on the belt sander, I ran down to Home Depot to pick up some belt sand paper. I was shocked thrilled to find an employee right away to help me- he was even already in the right aisle! Yay.  So I asked for 100 grit belt paper. After looking for a bit, he determined there was only 80 grit or 120 grit.  I told him a little about my project and said that I’m new at all this and his reply, “I’m new at this too.”  Oh boy. I’ve got 3 kids fighting jumping in and out of the over-sized cart (you know the ones like at Safeway with the whole kid car thing up front) and the employee helping me doesn’t know the difference between 80 grit and 120 grit sand paper. So I grabbed both, did the self-checkout thing, and headed home. 
January 2011 005
I got to work right away!January 2011 007
I was in such a rush to get started, I didn’t even bother finding my own shoes and just slipped on the first pair I saw {thanks DH}.
I started with the 4x4 posts that will be the legs. Here’s a pic of 3 posts sanded with 80 grit and 1 not, so you can compare before/after. It’s pretty ugly before sanding, so I was taking a leap of faith when I bought it.  And it paid off.  I’m sooooo happy with how it is coming out sanded. January 2011 009
The one on the right is not sanded yet {in case you couldn’t tell}
And here are all 4 finished, after using the 80 grit and then another pass {or 10} with 120 grit:January 2011 011
Aren’t they BE-U-TEEE-FUL?
Well, ok, hard to really get a good idea still…I understand if you think they still look a little ugly raw. But man are they SMOOTH.  AHHHHH.
Now I just have another, oh 10 hours of sanding left. {five 8 ft. long 2x8’s for the frame}  Sheesh, am I gonna be in shape by the time I’m done.

I’ll keep ya posted on my progress {no pun intended}!